Documentation Index
Fetch the complete documentation index at: https://docs.gp.scale.com/llms.txt
Use this file to discover all available pages before exploring further.
Recommendation & Future Development
While Agent Service remains supported, Agentex is the recommended path for all new projects. Future development, new features, and enhancements will be focused primarily on Agentex.1. Give your agent a name
The first step is to give your agent a name. This will be used to identify the agent in the SGP UI.
-
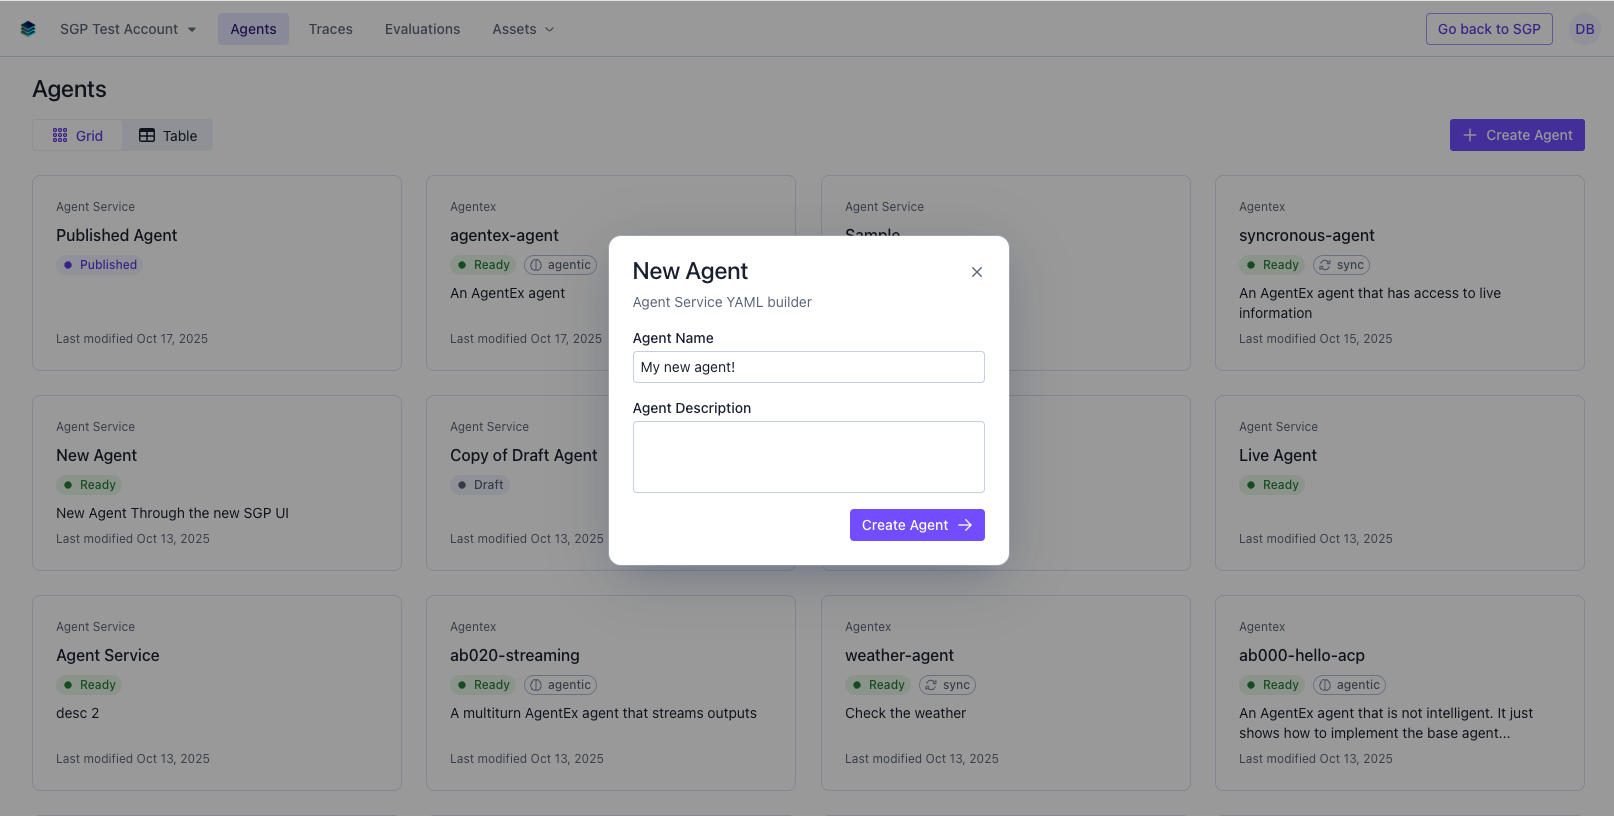
Navigate to the agents page.
-
Create a new Agent Service Agent using the top right Create Agent button.
-
Fill in the name of the agent and an optional description and click Create Agent.
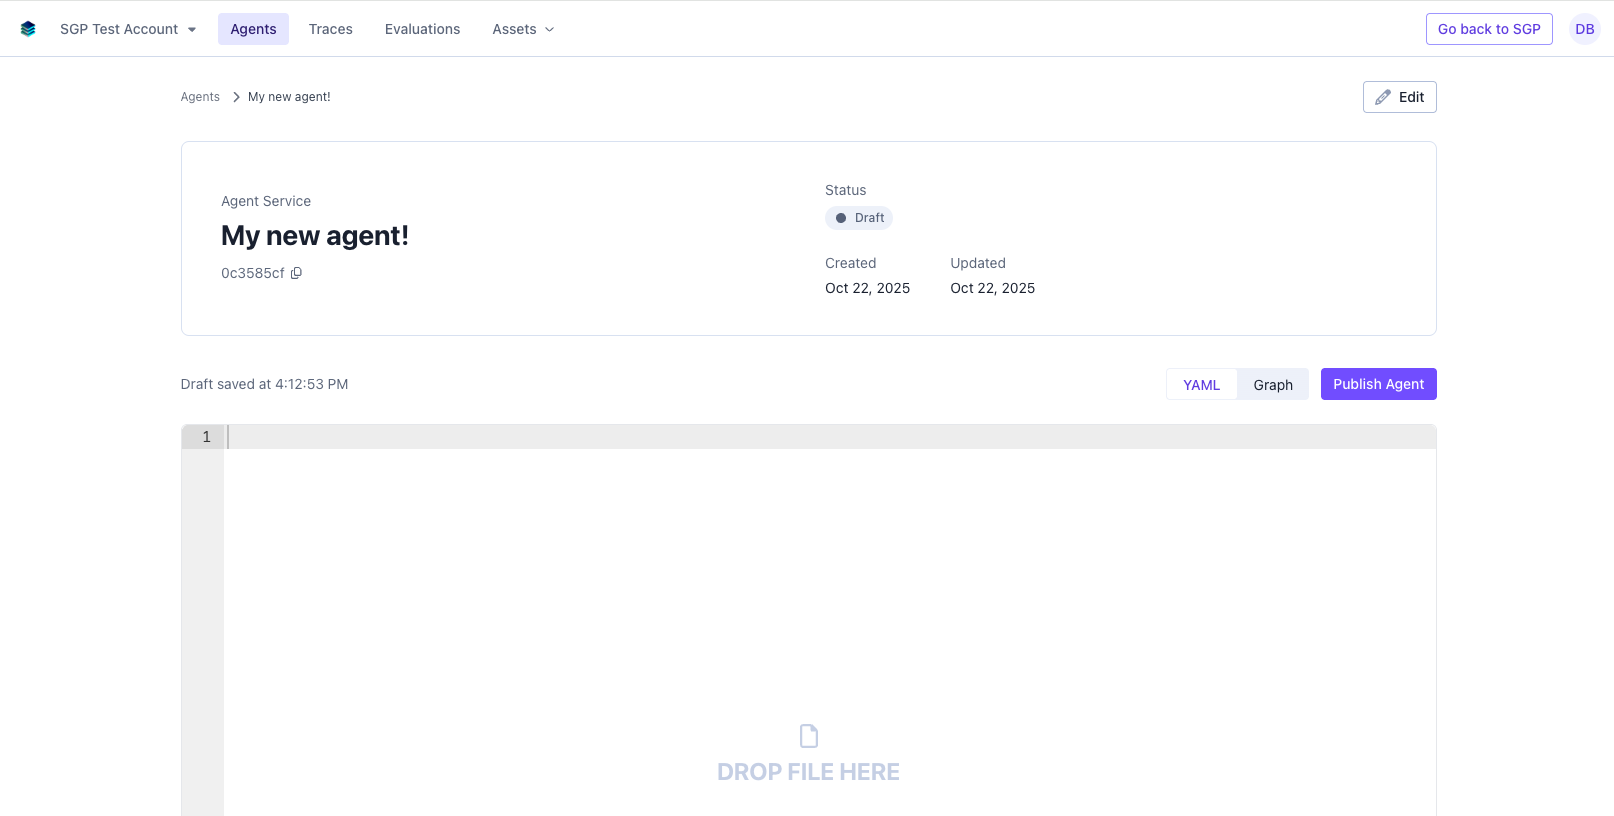
A draft version of the agent will be created and you will be redirected to the agent’s CI/CD page.
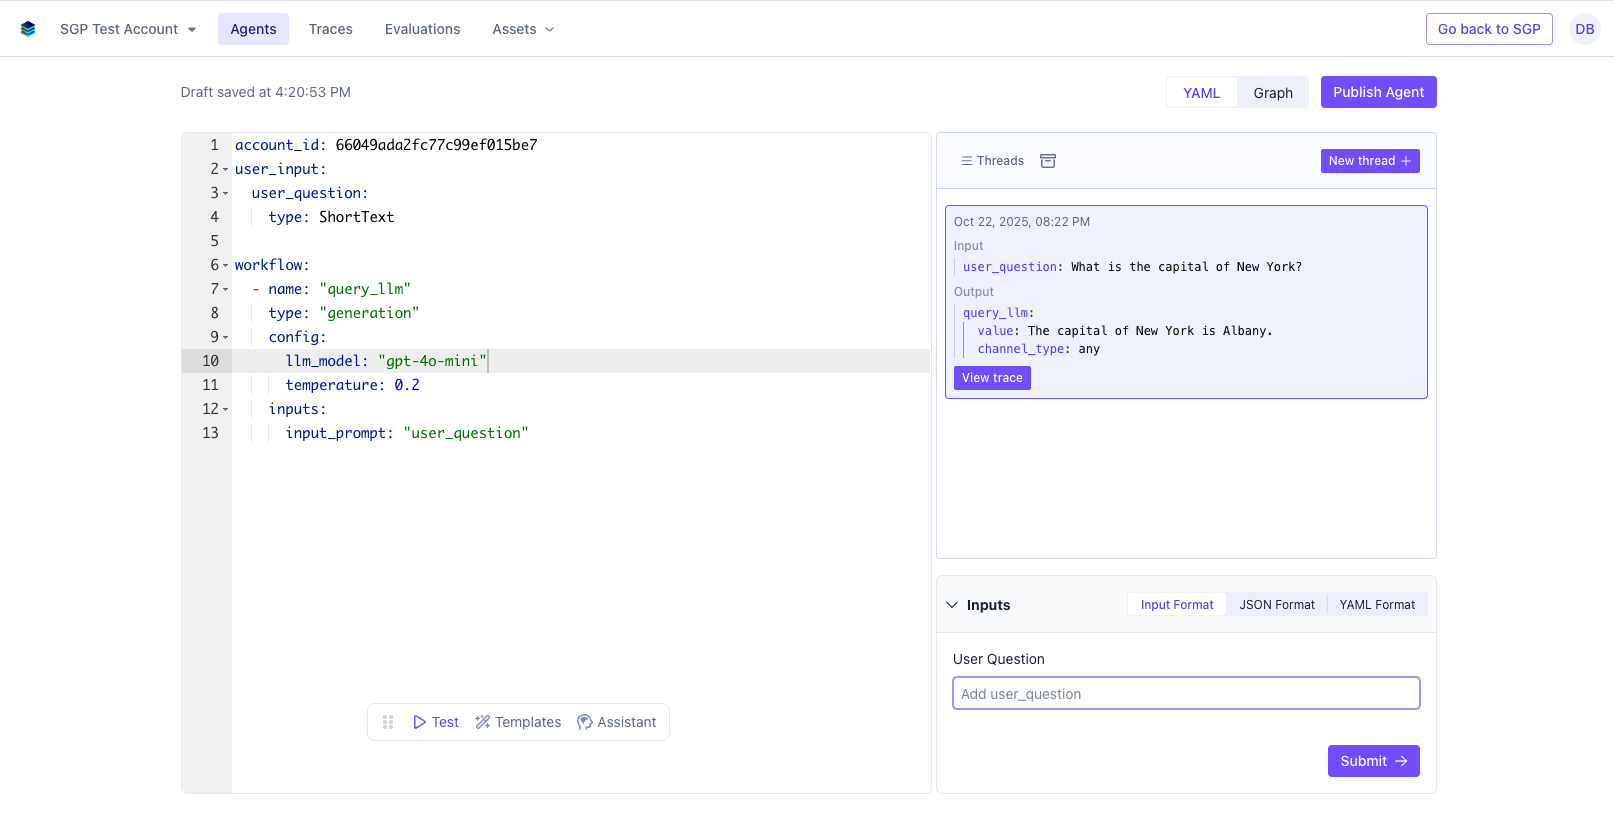
Now you should see your agent’s CI/CD page with a YAML editor featured prominently. Any updates you make to the YAML will be automatically saved.
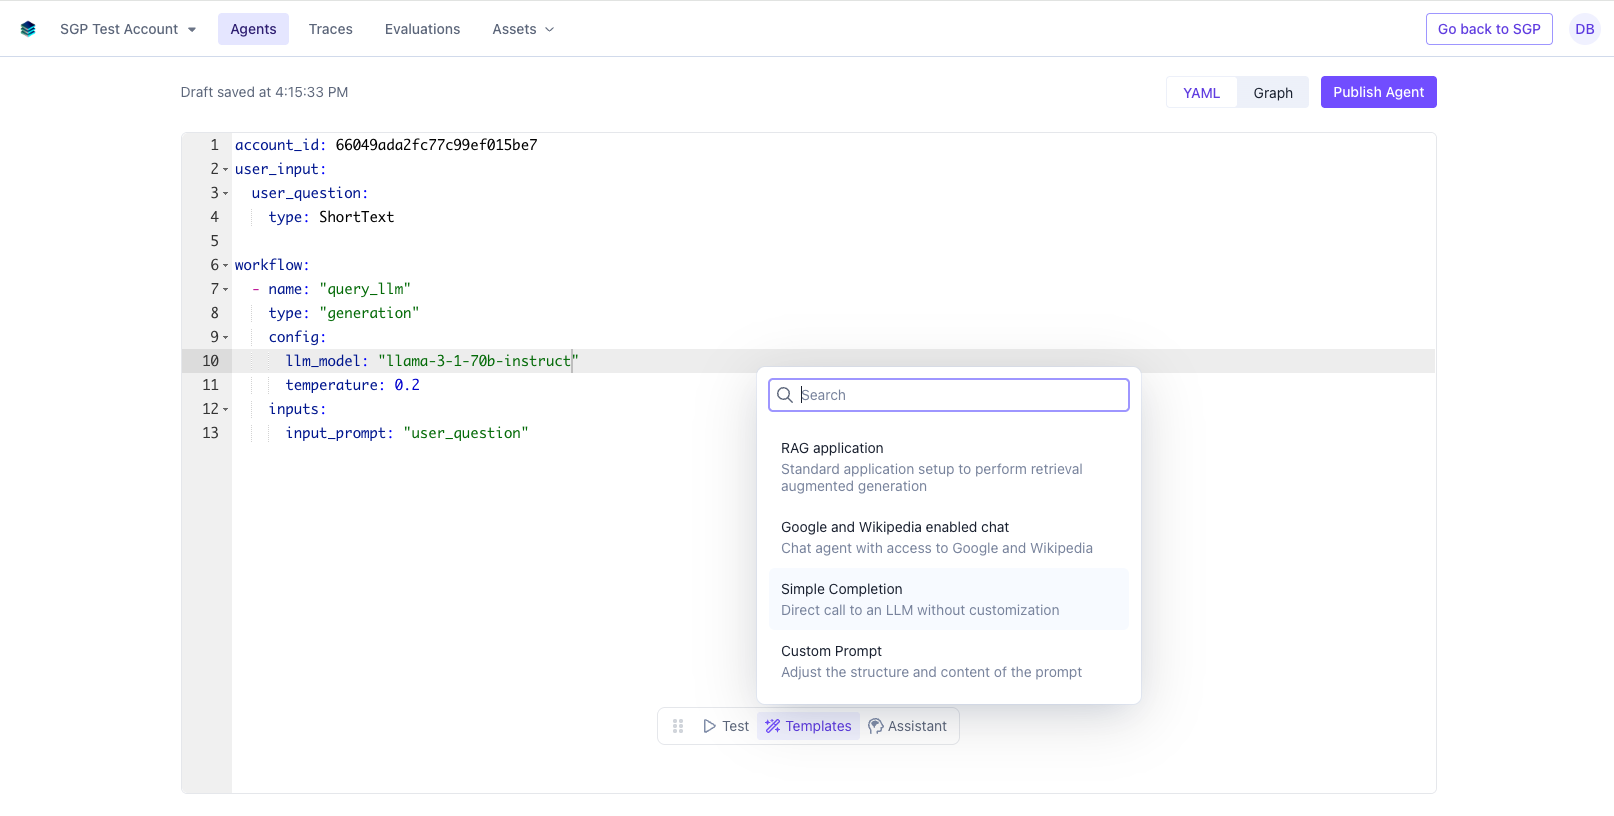
This YAML configuration is what is used to build the agent on the fly using Agent Service. You can copy and paste or drag and drop an existing YAML file from your local device.
Alternatively, you can get started by selecting a template from the Use a template menu in the bottom. This is a library of preconfigured YAML files or snippets that we are constantly expanding. Selecting the template will immediately update the YAML in the editor, which you can modify.
For example, you could swap the llm_model from gpt-4o-mini to another one like llama-3-1-70b-instruct for an open source alternative. Note that these models are directly interfacing with SGPs model API and can be called by name or by using the model_deployment_id.
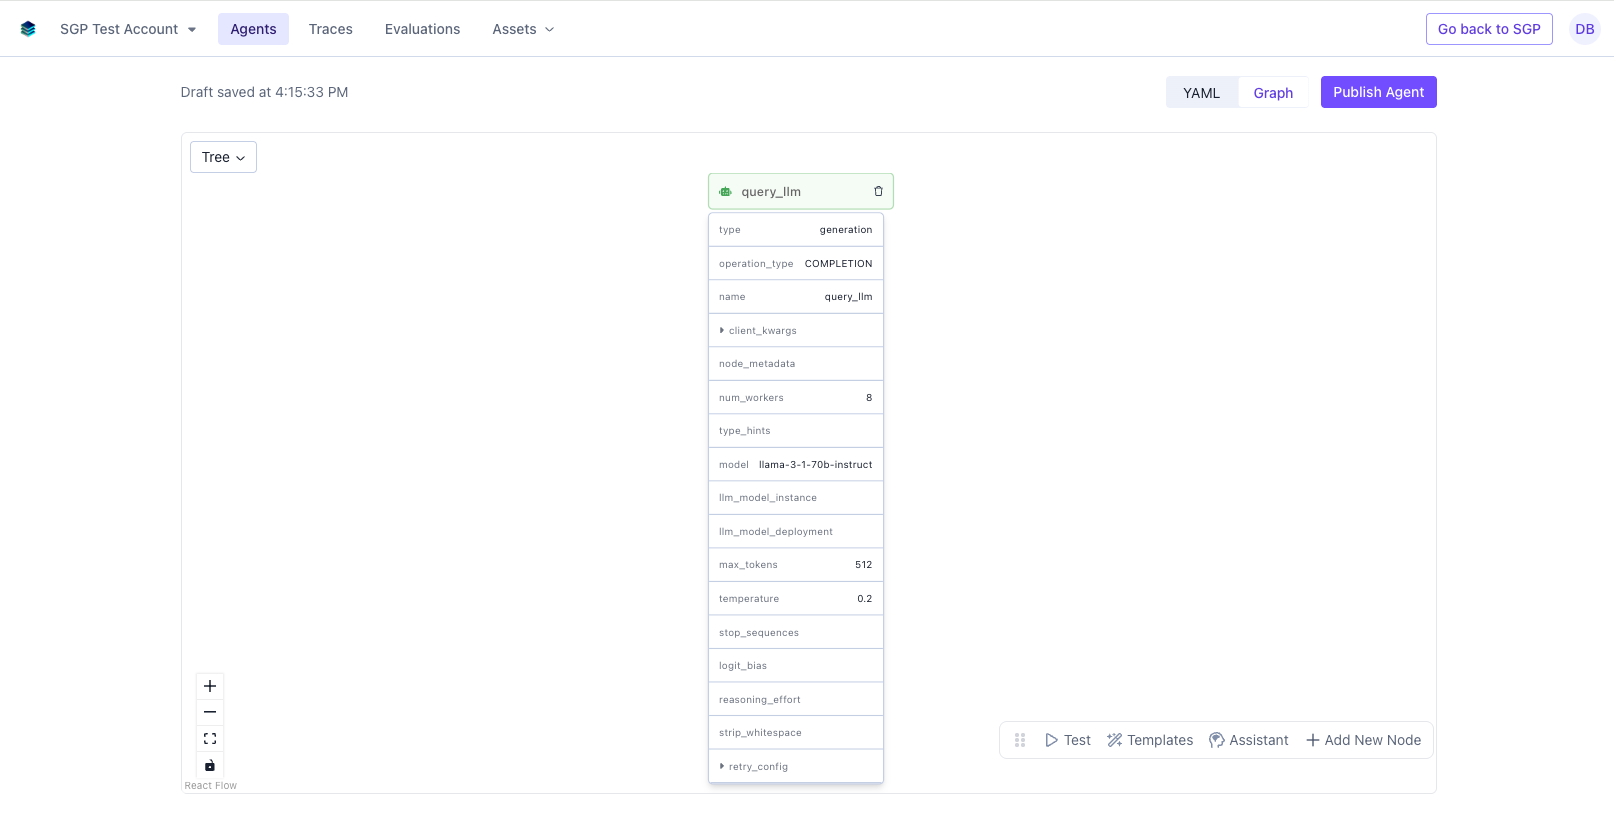
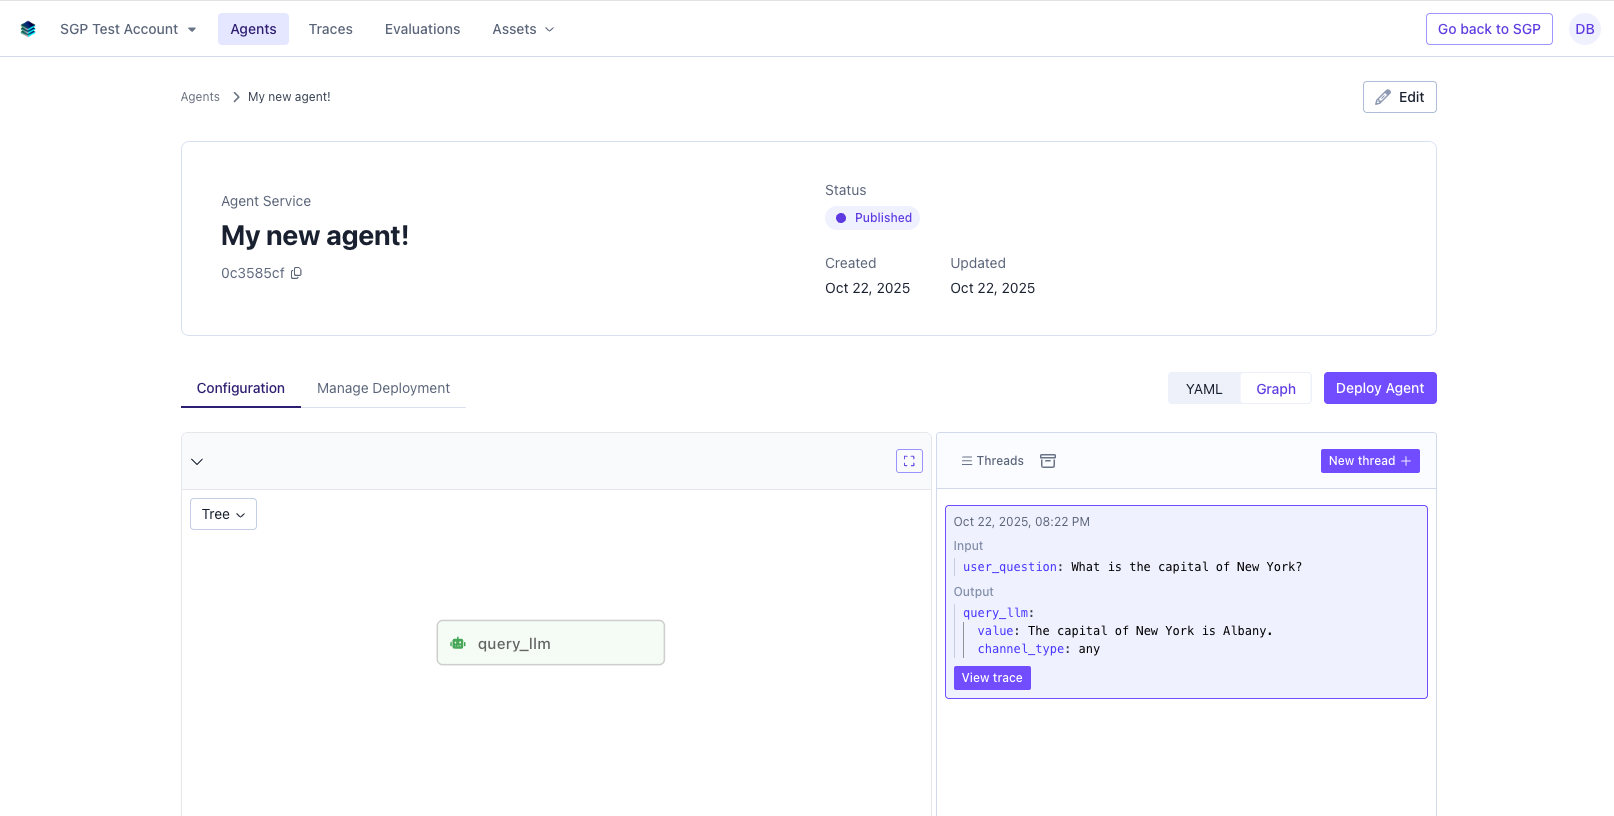
Often, it is useful to visualize this workflow. To do that, you can swap to the Graph view on the top left, which will show a node visualization of your workflow or state machine application. Clicking on any of the nodes shows its configuration.
3. Test your agent
You can easily test the current configuration (as long as it is a valid YAML). To do that click Test in the bottom menu.
By changing your YAML configuration and continuously testing its output, you can iteratively adjust your agent until it has reached the desired state. The Threads panel on the right supports multi-turn by default. If you want to reset context and start a new thread, just click New Thread.
The YAML configuration is auto-saved continuously to ensure progress is lost.
4. Publish your agent
Once you want to go ahead and publish the configuration for deployment, you can hit Publish Agent in the top right. After an agent is published its configuration is immutable and cannot be changed. Only its name and description can be updated.
What’s next?
Using the templates captures only a tiny fraction of what is possible with Agent Service. To write you own custom configurations you need to learn the set of available nodes, connections and techniques.
Learn more in our v4 documentation on Building Agents.